
The complete guide
How to Choose and Use a Window Screen Repair Kit
The problem with a torn window screen
A hole in a window screen starts small and never stays that way. The mesh is under tension, so a nick from a branch or a cat's claw spreads along the weave every time the wind pushes on it. Within a season a pinhole becomes a flap, and the screen stops doing the one job it has.
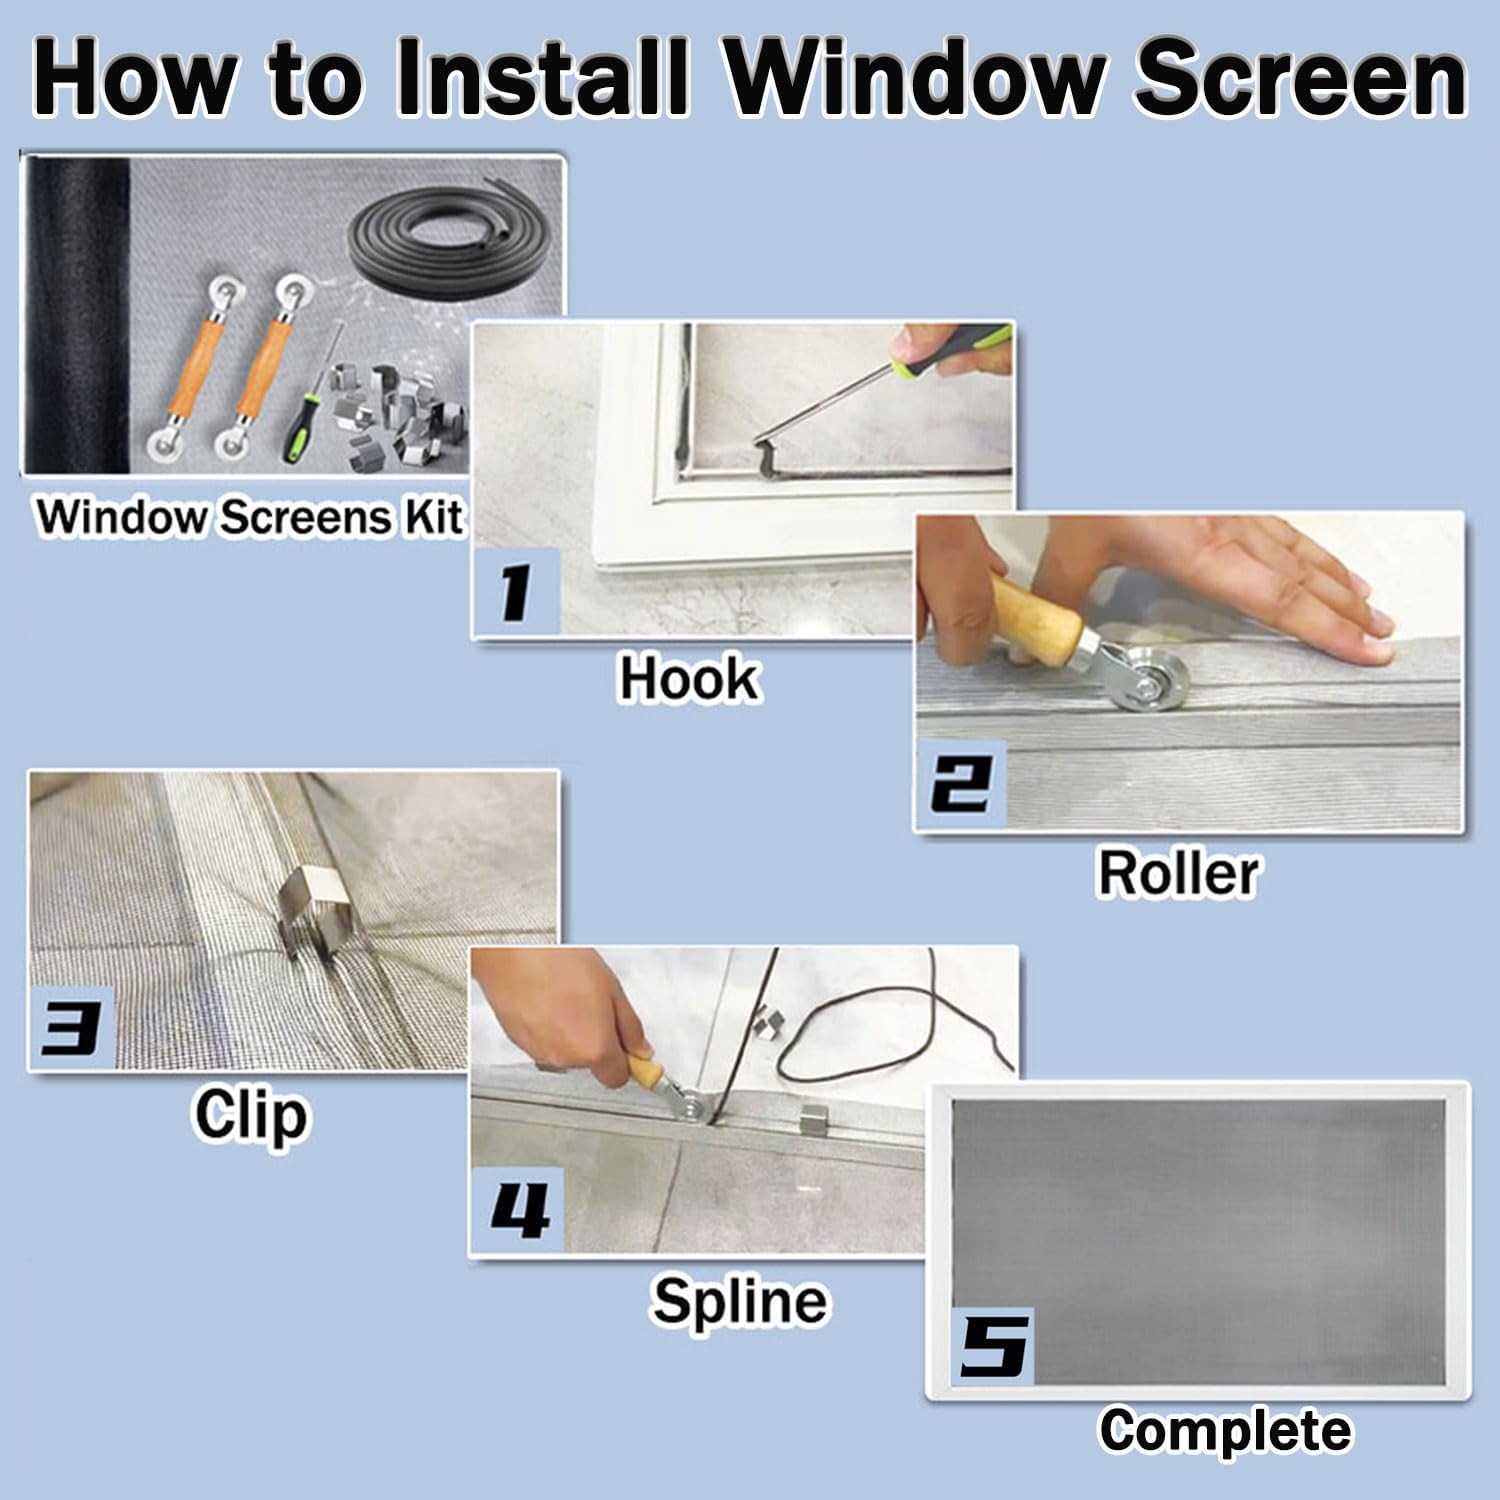
Most people put up with it longer than they should. The assumption is that fixing a screen means taking the frame to a shop, or worse, buying a whole new screen at a price that feels out of proportion to a bit of mesh. Neither is true. The mesh sits in a groove around the inside of the frame, held there by a flexible cord called spline. Pull the spline out, lay new mesh over the frame, roll the spline back in, trim the excess. That is the entire repair.
The reason it does not get done is usually that you need four or five different things to do it and none of them live in a standard toolbox. That is the gap a 6-in-1 kit fills.
How the spline system actually works
Look at the back of any aluminum window screen and you will see a thin rubbery cord sitting in a channel around the perimeter. That is the spline. It does not glue or clamp the mesh. It wedges it.
The groove is slightly narrower than the spline, so when you press the spline in with mesh laid over the top, the mesh gets pinched between the cord and the walls of the channel. Friction holds it. Tension in the mesh pulls against that friction, which is why the spline has to be a snug fit and why the mesh needs to be reasonably taut before you finish.
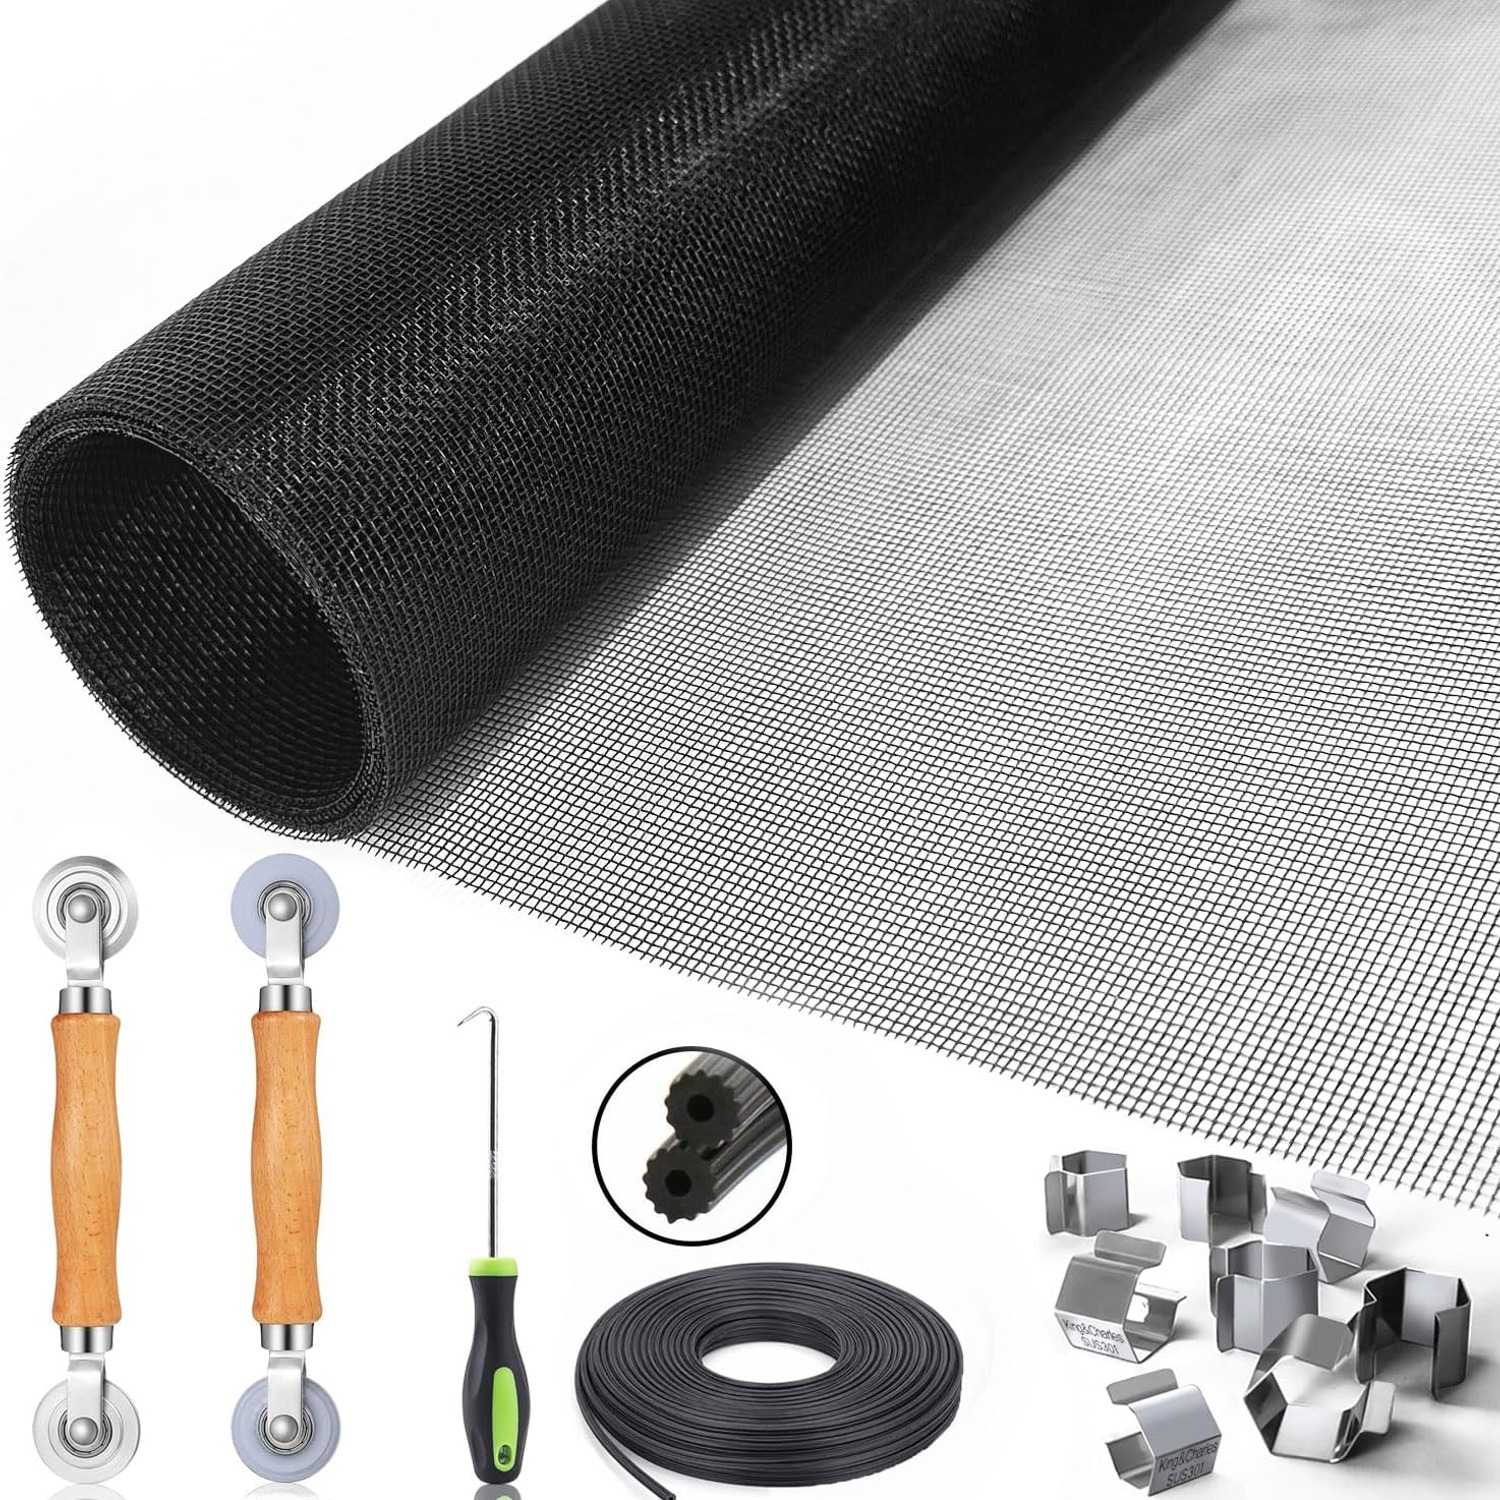
The hollow spline supplied in this kit is 0.14 inches across. Hollow means it squashes a little as it goes in, so it presses in with manageable hand pressure and then springs back against the channel walls. That makes it easier to seat than solid spline of the same nominal size, and it is one of the reasons hollow is the common choice for home repair.
Spline sizing is the single thing worth checking before you start. Grooves vary between manufacturers and across decades of window design. The 0.14 inch cord here is designed for channels in the 0.12 to 0.16 inch range, which covers most residential frames. If you pull out your old spline and it looks noticeably thicker or thinner than a pencil lead doubled, measure it.
What the six parts do
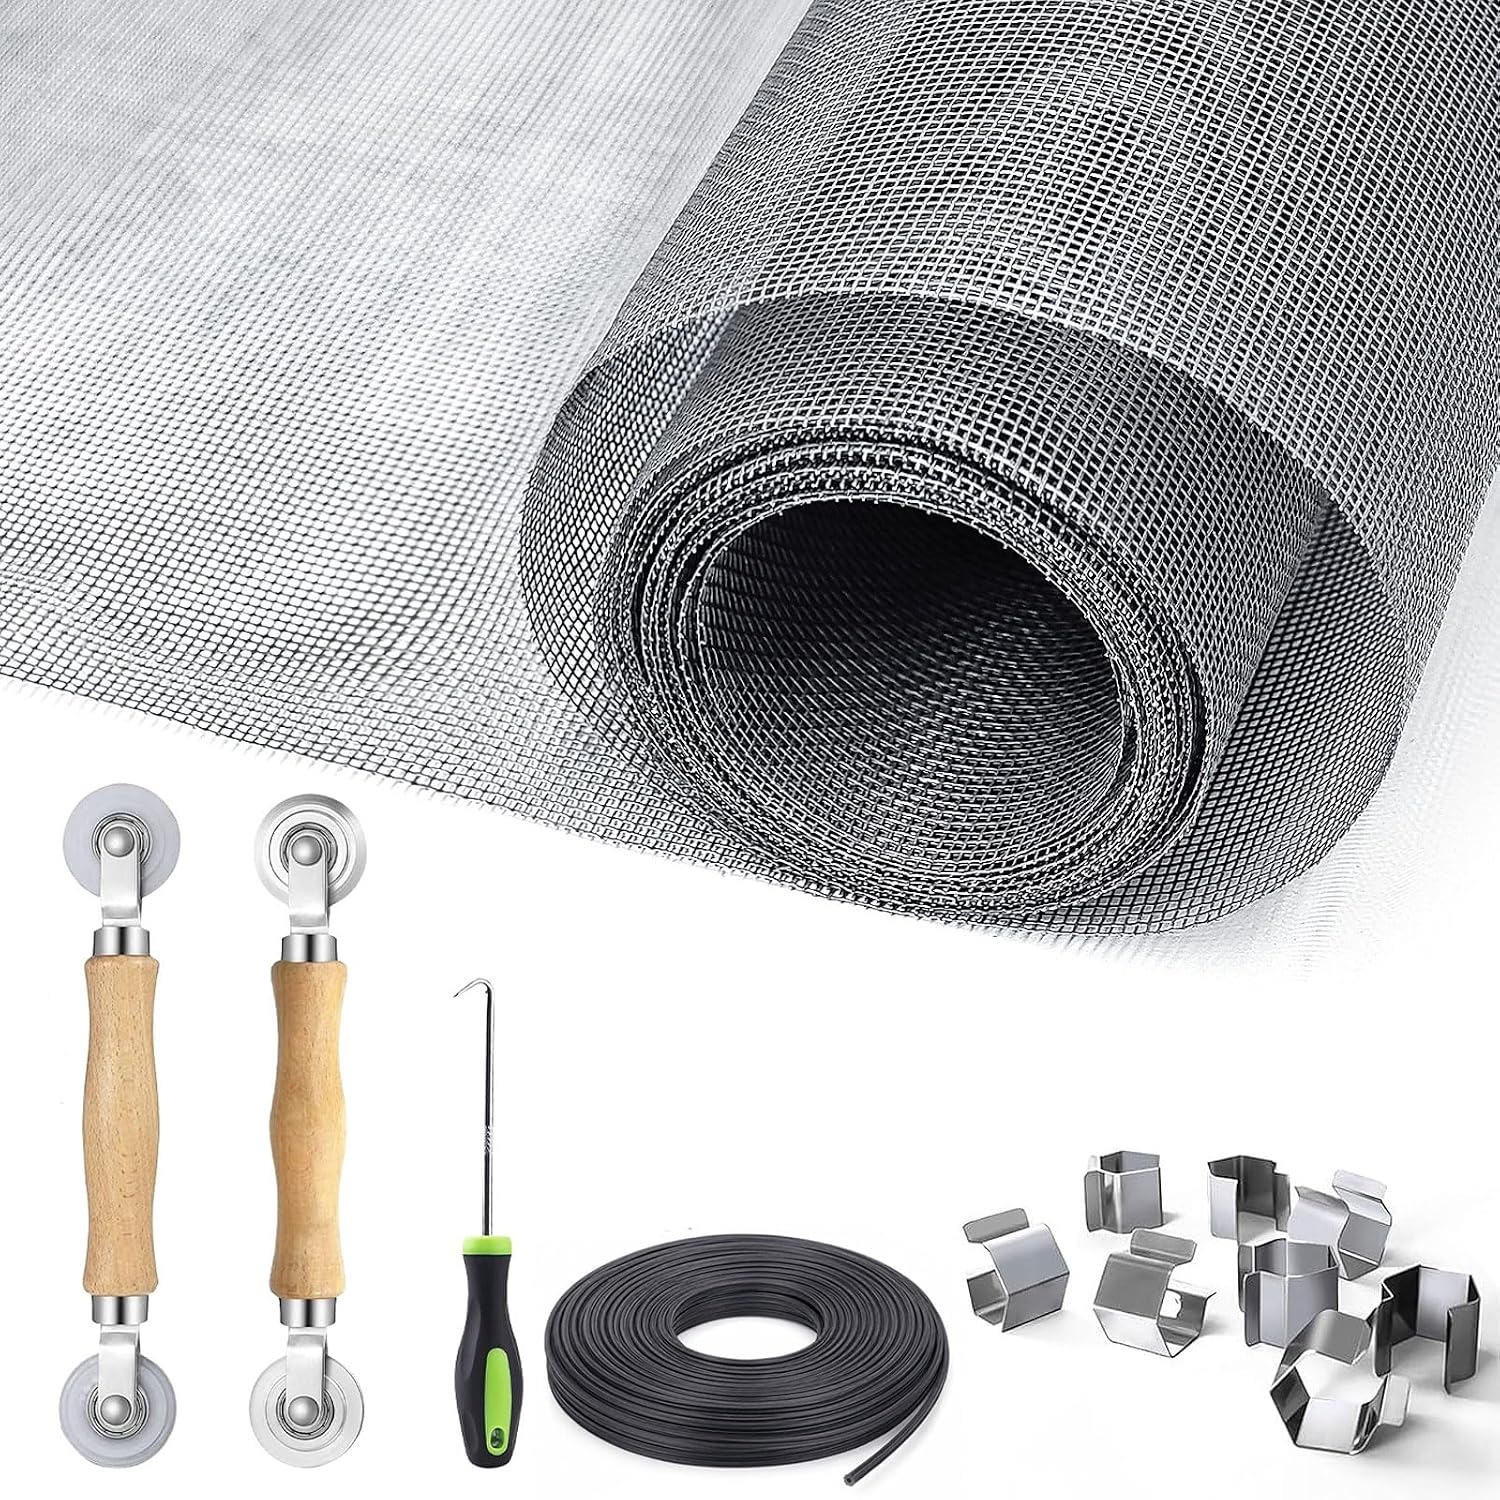
The removal hook comes first. It is sharpened so it can get under old spline that has gone hard and shrunk into the groove. Hook a corner, lift, and the rest usually walks out in one length.
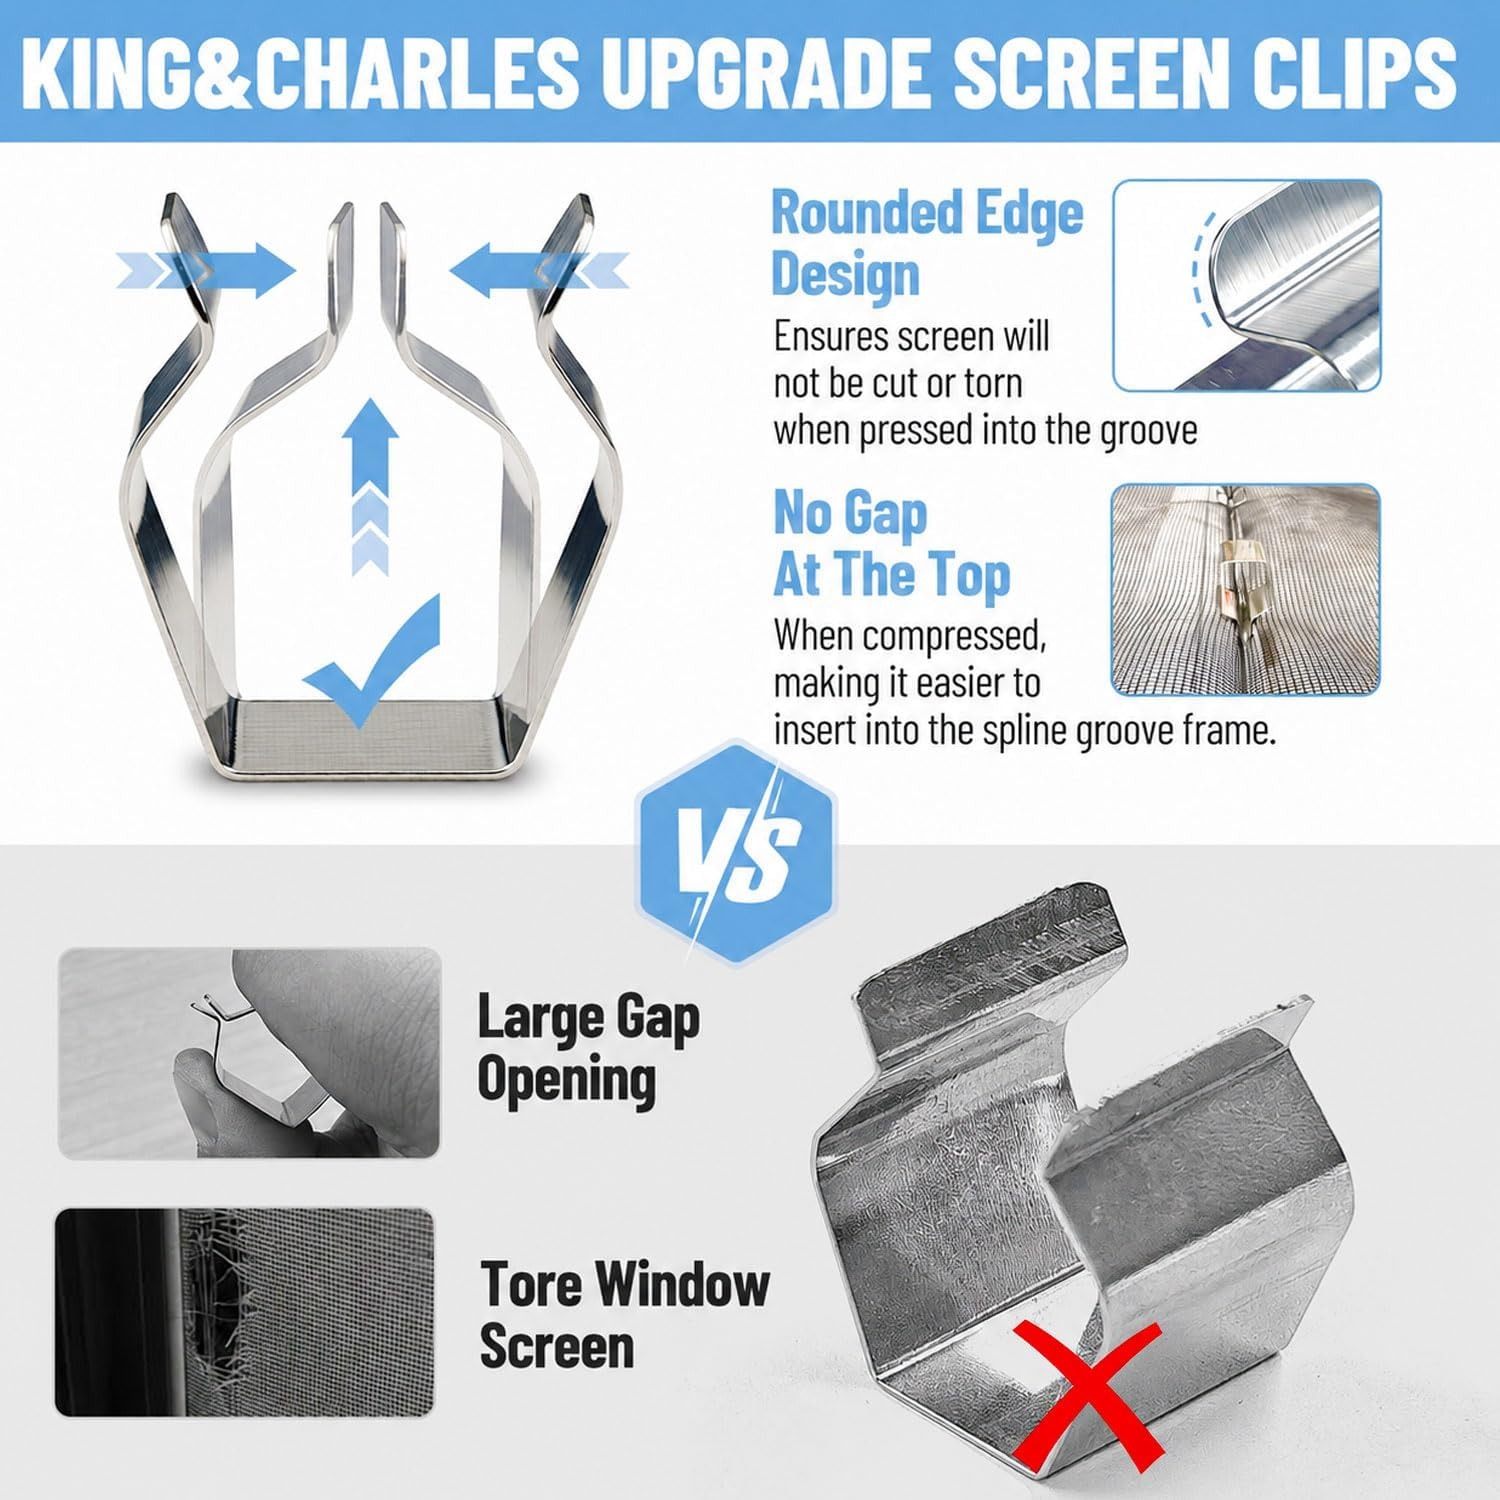
The eight manganese steel clips are the part most people underrate. They grip the frame edge and hold the mesh flat while you work. Without them the mesh slides as the roller passes over it, and you finish with ripples that you only notice once the screen is back in the window. Clips also let you work alone rather than asking someone to hold things.
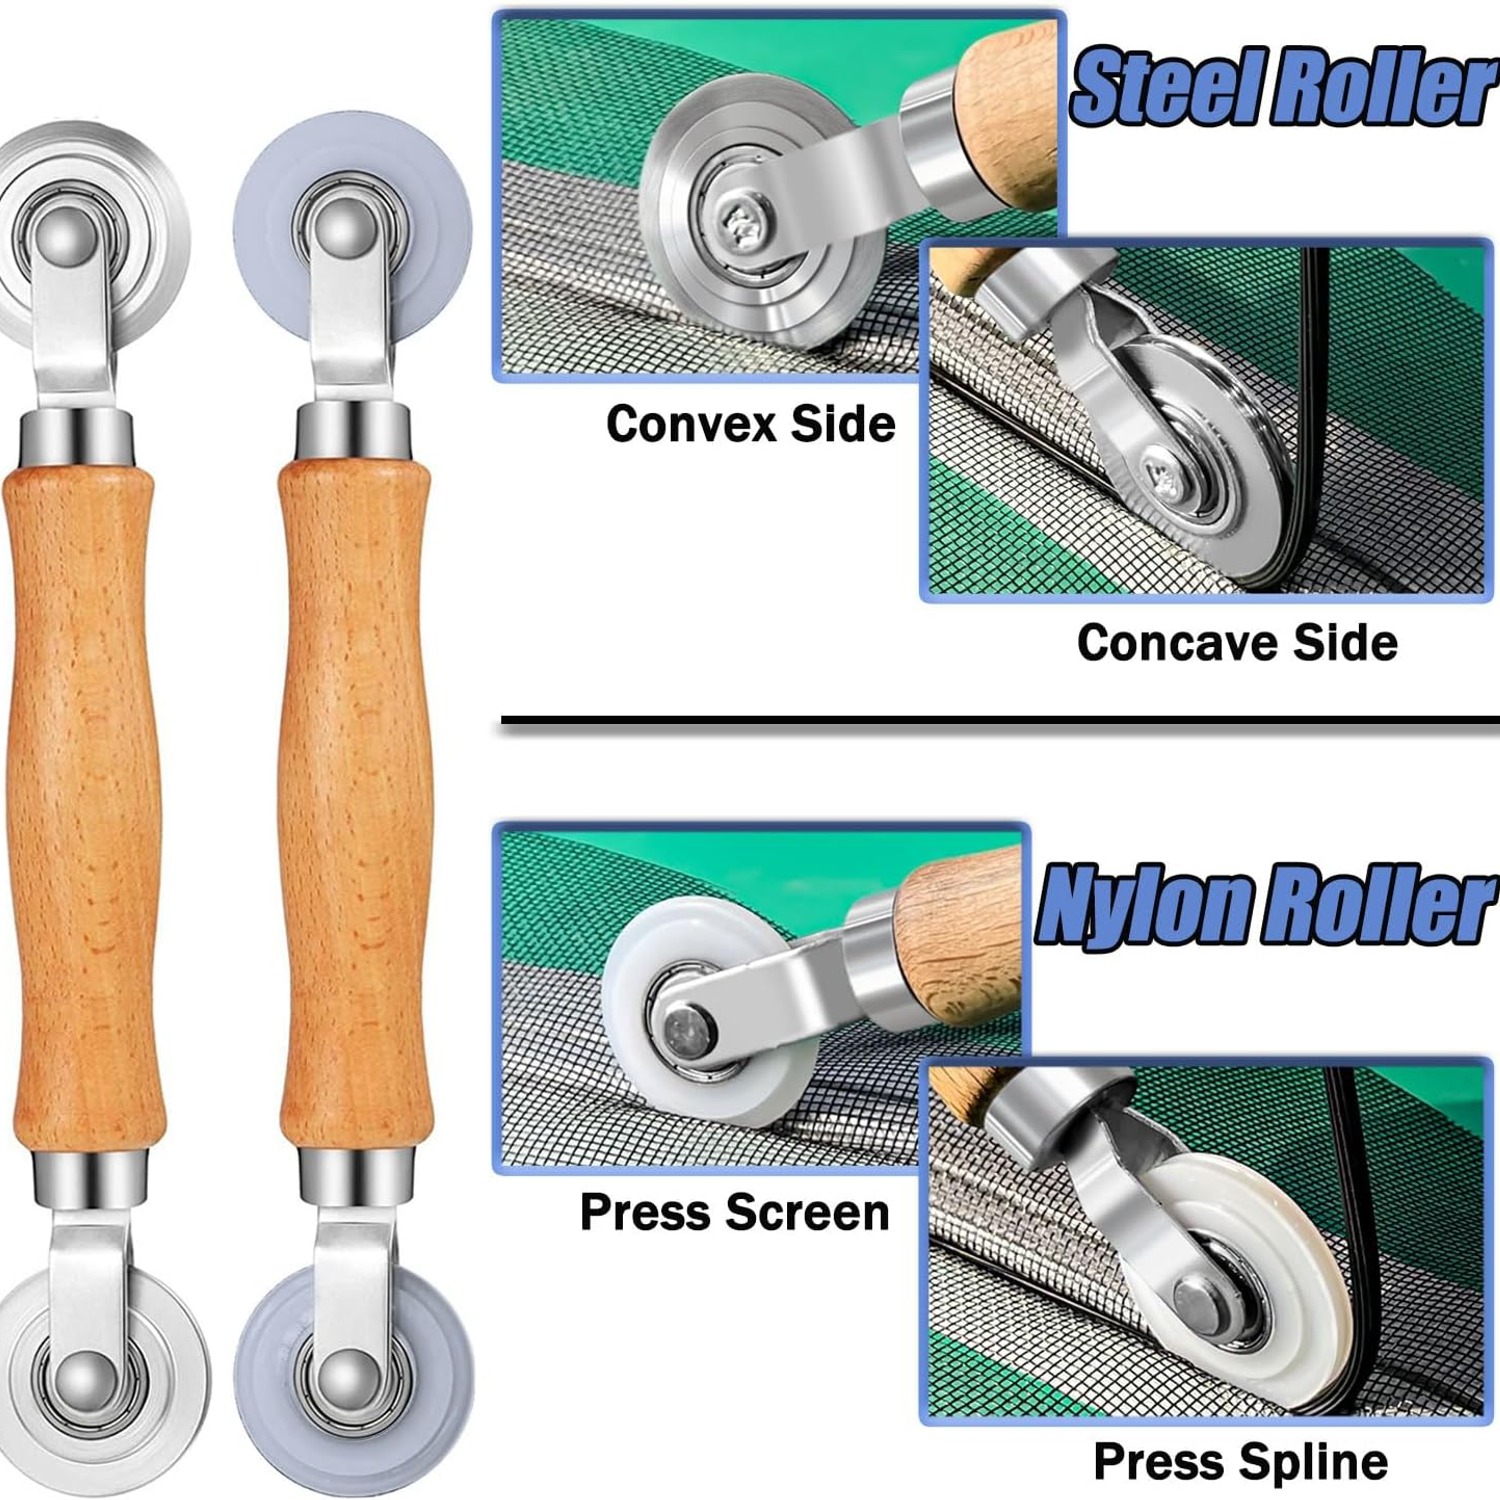
Two bearing rollers cover both mesh types. The steel wheel is for metal mesh, which is stiffer and needs more force to bed down. The nylon wheel is kinder to fiberglass. Each roller has a convex wheel on one end for pushing the mesh down into the groove, and a concave wheel on the other for rolling the spline in on top of it. The bearings matter more than they sound. A wheel that turns freely rolls across the spline, while a seized wheel drags the mesh sideways.
Then there is the spline itself at 50 feet, and the mesh panel at 48 by 118 inches. A standard household window screen might use twelve to fifteen feet of spline, so the roll handles several frames.
Choosing the right mesh
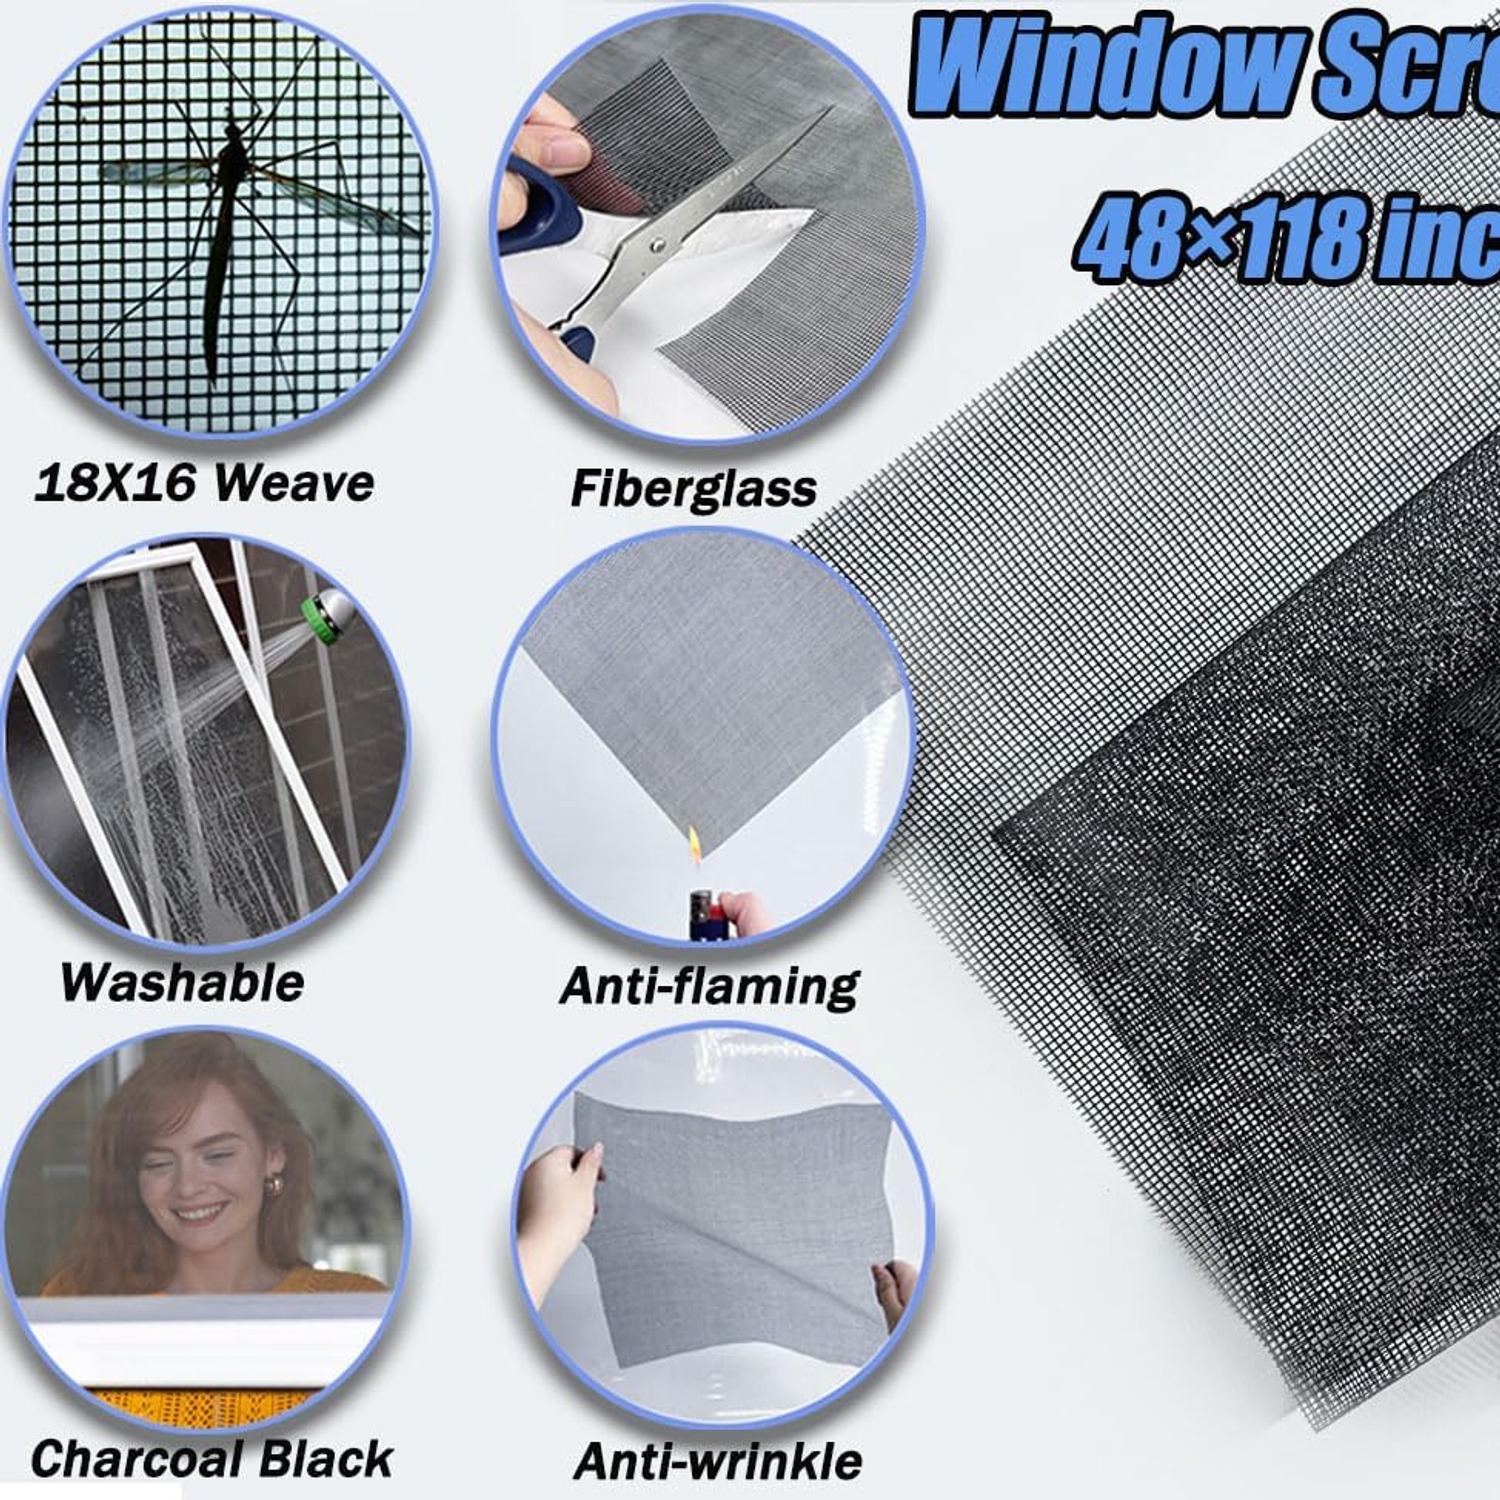
The mesh in this kit is fiberglass in an 18 by 16 weave. That means 18 strands per inch one way and 16 the other, the standard specification used on most residential insect screens. It keeps mosquitoes and the usual household flying insects outside while letting air move through.
Fiberglass has two practical advantages for a home repair. It has a little stretch, so a knock from a ball or a pet bounces rather than dents, and a cut edge does not unravel. Metal mesh is tougher against claws but it creases permanently and it fights you during installation.
Charcoal black is the color here and it is the standard for good reason. Dark mesh absorbs light rather than scattering it, which means less glare and a clearer view out. From the street the same mesh reads as a dark panel, which gives a bit of daytime privacy. Lighter mesh does the opposite on both counts.
The 18 by 16 weave will not stop very small insects such as midges or no-see-ums. If those are a local problem you want a tighter weave, and that is a different product. For general mosquito and fly control this is the right density.
Who this suits
Anyone with a house full of aluminum framed screens. Window screens, sliding screen doors, storm doors and entry door screens all use the same groove and spline arrangement, so one kit covers the lot.
It also suits patio, porch and pool screen enclosures, though those panels are often much larger and will eat through mesh faster than a window will. Measure the whole job before you cut.
Caravan and RV owners get good value out of a kit like this because RV screens take a beating from branches, loading and road grit, and the panels are usually small enough that one mesh sheet handles a whole vehicle.
If your screens are held in with beading or staples rather than spline, this is not the right tool set. Have a look at the back of one frame first. If you cannot see a visible cord sitting in a channel, stop and check.
Doing the job properly
Work on a flat surface with the frame laid down and something soft underneath so you do not scratch it. Pull the old spline out with the hook and bin it, since old spline is almost always hardened and will not grip the same way twice.
Lay the new mesh over the frame with a few inches of overhang all round. Clip it at the corners. Start with one long side, pressing the mesh into the groove with the convex wheel, then rolling the spline in behind it with the concave wheel. Do the opposite long side next, then the two short sides. Working opposite sides keeps the tension balanced.
Keep the mesh gently taut, not drum tight. Over-tightening an aluminum frame can bow it, and a bowed frame will not sit properly in the window track. A small amount of give is normal and correct.
Trim the excess with a utility knife run along the outside edge of the spline. Keep the blade shallow and angled away from the mesh you are keeping.
Looking after the kit
The tools are the part you keep. Wipe the rollers clean, keep them dry, and put them back in the box rather than loose in a drawer where grit will get into the bearings. A drop of light oil on the bearings once a year is plenty.
Store leftover spline coiled loosely rather than kinked tight, and keep it out of direct sunlight. UV is what hardens vinyl over time, which is the same reason the spline in your windows eventually fails.
For the mesh itself, a soft brush and mild soapy water takes off dust, pollen and cobwebs. Rinse and let it dry completely before refitting. Avoid pressure washers, which can stretch or tear the weave.
The short version
A window screen repair kit turns a job you were quietly dreading into an afternoon's work. This one bundles the removal hook, eight holding clips, two double-sided bearing rollers, 50 feet of 0.14 inch hollow spline and a 48 by 118 inch charcoal fiberglass mesh panel into a single box weighing just over a kilogram.
Check your groove size against the 0.12 to 0.16 inch range before you start, work opposite sides to keep tension even, and trim after the spline is seated rather than before. The consumables run out eventually, the tools do not, and the second screen always goes faster than the first.